Creating configurators with paramate
In this section, we will introduce how to create a basic application that interacts with paramate using trCAD scripts.How it works
There are two main parts needed for developing a full customizing application using paramate: the configurator frontend (e.g. a web page) and the configurator backend. In this tutorial we will use trCAD as the CAD engine, you can read the Getting Started Examples page on the trCAD website that shows how to write your own trCAD scripts to build trCAD-based configurators.
The configurator backend handles the geometry generation logic and can be set up using the paramate Admin. In the paramate Admin all resources necessary for the construction of the desired geometry (that is, STL files, image files, script files) plus the setting for one configurator will be stored. Those files and setting related to the backend of one configurator are just briefly called “a configurator” in the paramate Admin context. Every configurator must have a main script that interacts with all those resources. In this example, it will be a trCAD script, called main.sps. All those files must be uploaded and stored in the corresponding configurator in the paramate Admin. The paramate API gets all the parameters from the user interface (e.g. a web page), use them as input for the main script and produces an output - a geometry - which is then rendered in the 3D-Viewport of the application.
In this Tutorial, we will go through all the steps required to set up a basic configurator in the paramate Admin.
Setting up a new configurator in the paramate Admin
First, you need to access the paramate Admin Login page. Type in your credentials, that should have been already provided to you (contact us if you need help). After you sign in, you should see the following page:
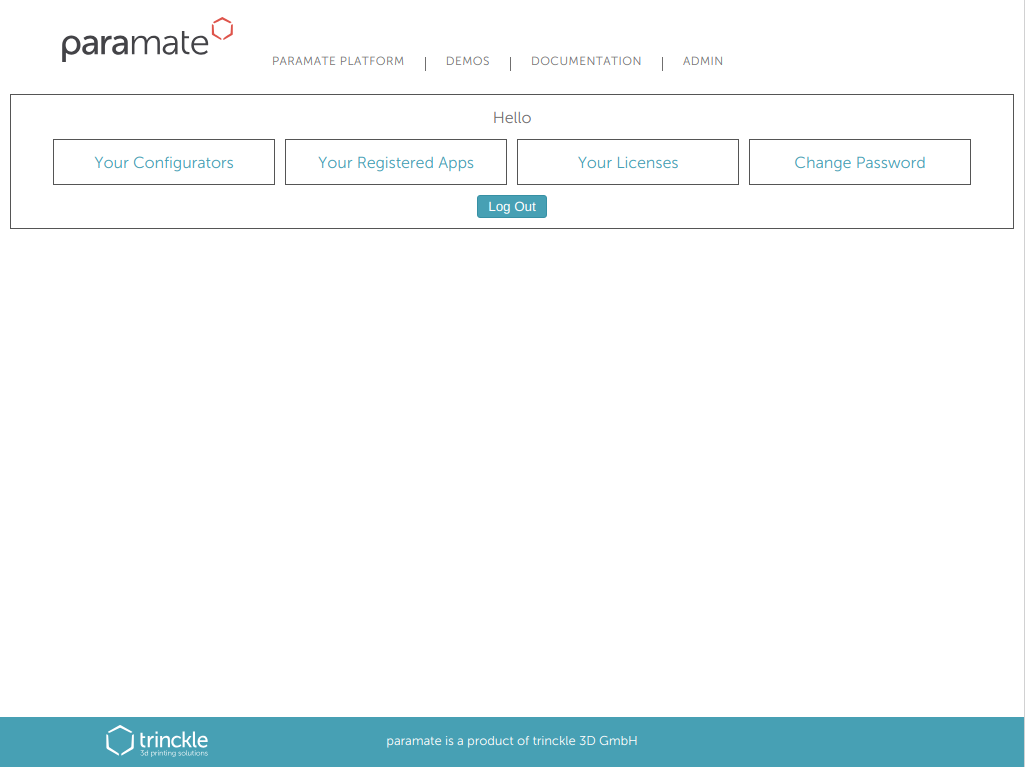
Click at the Your Configurators button to go to your registered configurators page. You should now see a page with a list of all your configurators. To create a new configurator, click at the Create New button at the top of the page. You will be prompted to type in a name for the configurator. Type in a name that best suits it and click save. This name can be changed later. You should now see a page with the details of your newly created configurator.
Uploading required files
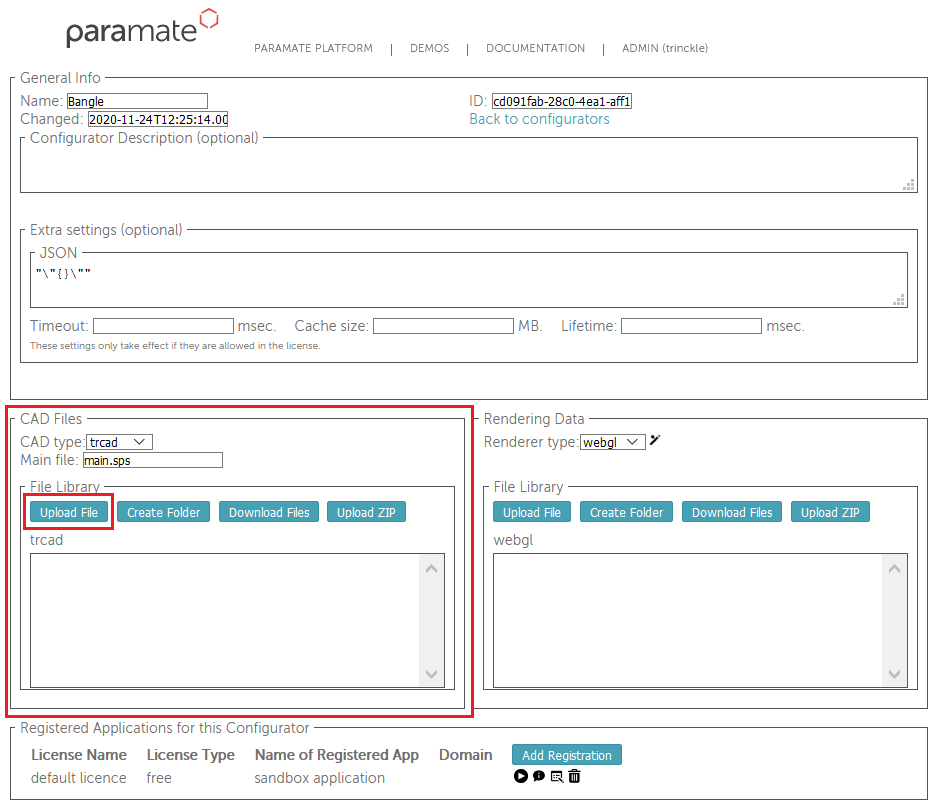
The next step is to upload all the necessary files to the configurator. By following the following directory structure, all the files inside the model folder should be uploaded to the File Library located inside the CAD Files section on the left side of the configurator Details page.
|---- configurator/
|     |---- model/
|     |     └---- main.sps
|     └---- renderer/
|           |---- img/
|           |     |---- matcap_copper_256.png
|           |     |---- matcap_gloss_256.png
|           |     |---- matcap_gold_256.png
|           |     |---- matcap_matt_256.png
|           |     └---- matcap_metal_256.png
|           |---- shd/
|           |     |---- matcap_glossy_col.fs.glsl
|           |     |---- matcap_glossy_col.vs.glsl
|           |     |---- matcap_glossy_transparent_col.fs.glsl
|           |     |---- matcap_glossy_transparent_col.vs.glsl
|           |     |---- matcap_normal_col.fs.glsl
|           |     |---- matcap_normal_col.vs.glsl
|           |     |---- matcap_reflect_col.fs.glsl
|           |     |---- matcap_reflect_col.vs.glsl
|           |     |---- matcap_reflect.fs.glsl
|           |     |---- matcap_reflect.vs.glsl
|           |     |---- matcap_transparent_col.fs.glsl
|           |     └---- matcap_transparent_col.vs.glsl
|           └---- scene.json
Just click Upload File and select the required file. By now, you will only upload the main.sps file. Also, make sure that CAD Type is set to trcad and Main file is main.sps. The main.sps can be any simple example of trCAD script you want, so just copy any of the scripts from the Getting Started Examples or download this file.
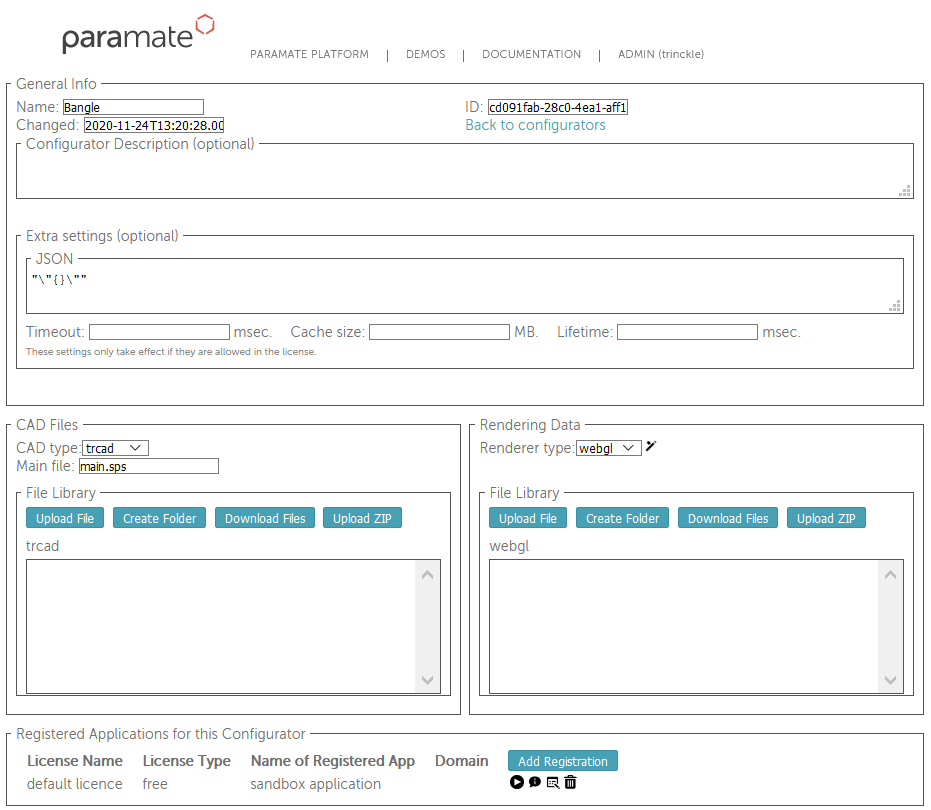
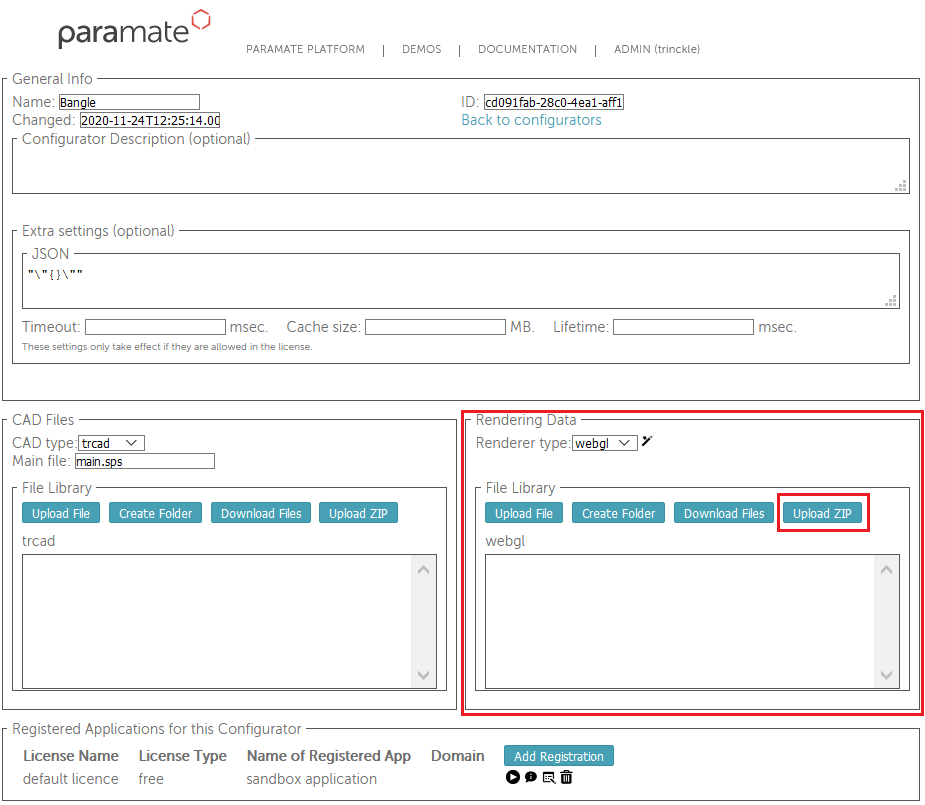
The last files you will need are the renderer files. You can simply create them by clicking on the wizard icon next to the Renderer Type selection.

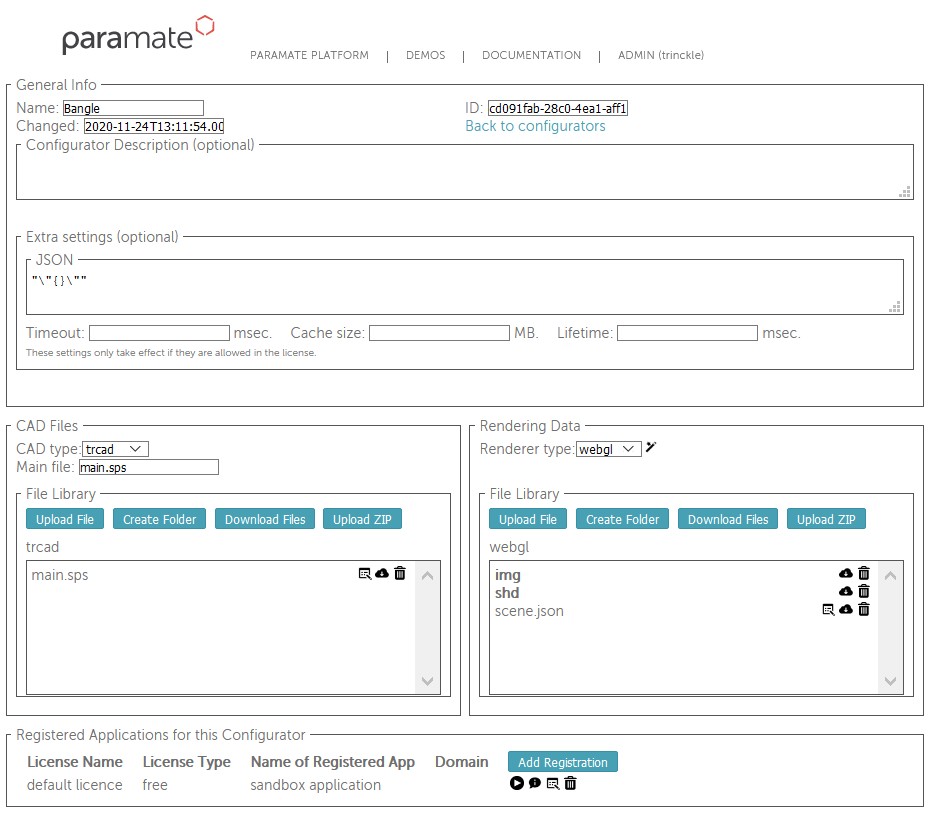
In the end, you should have something like the following image:
Testing your configurator
To have your configurator application running, it needs to be registered it in the paramate Admin. This is required as two important things are needed to run your application: the API Key and the Configurator ID. If you have a free testing license then a sandbox application has automatically been set up and registered for your new configurator with that license. (If this is not be the case, contact us).
The registered applications are listed in the corresponding section at the bottom of the page. There you can also find two important buttons for testing and developing: the Info Button and the Play Button.
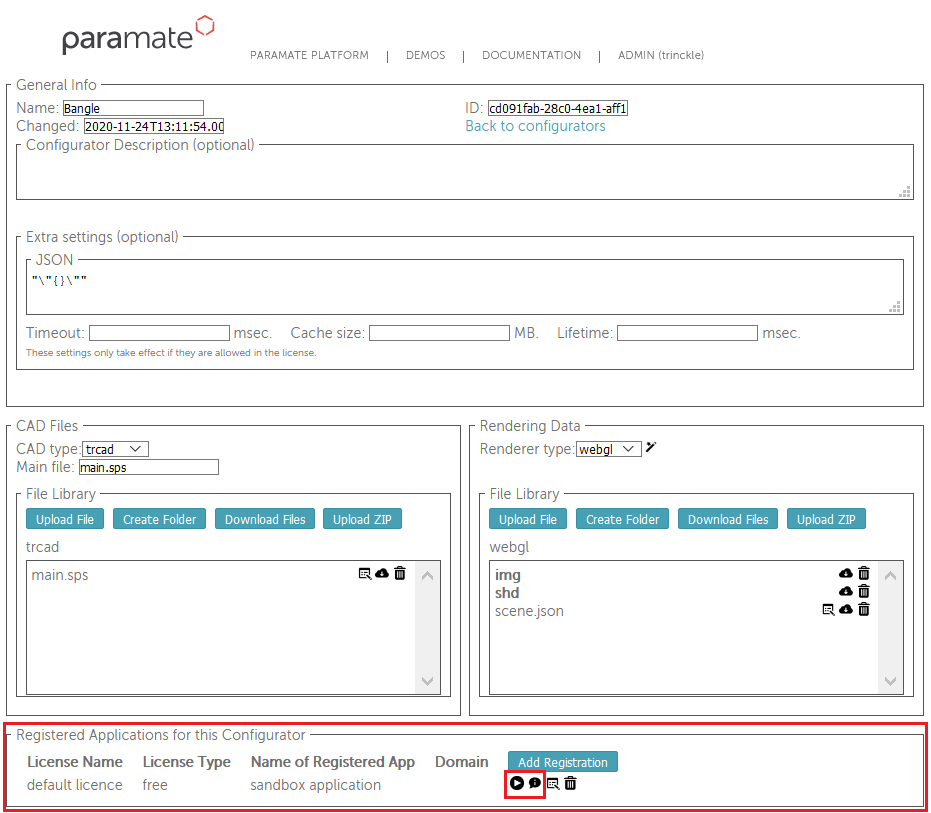
To test your configurator directly from the paramate Admin, launch the build-in test application for your configurator using the play button. (Make sure to allow the popup that is triggered).
To test the workflow of developing a custom frontend, click on the info button. The popup that shows up will have some short HTML code. You can copy this and save it into an HTML file in your computer, then you can open that in a browser and see your configurator working with a very basic setup. This HTML can be used as a basis for starting developing your own frontend as well. Besides the HTML code the popup shows the main information for accessing the configurator set up in the paramate Admin from a surrounding application: the API Key and the Configurator ID.